Today I Learned how to set up a blog to host this… well blog!
The Goal
I have a domain name for myself which I’ve been using for e-mail, robvk.uk. I want to host a page on that domain pointing at this blog, my Twitter, LinkedIn, etc. Then I want to have a subdomain til.robvk.uk pointing at this blog. Ideally I’d have it all hosted together with the subdomain routing to a folder within the main site.
So ideally I’d run the blog in a folder with the subdomain pointing at it, and have a single page in the root with the domain pointing at that. But immediately I have many questions: Does GitHub Pages support multiple incoming domains? Can I point a subdomain at a folder within the Pages repository? Does Jekyll work in a folder? How does Jekyll do relative links, is it going to break if it thinks it’s in a folder but on the subdomain it’s in the root? Etc.
This would be ideal. There are two fallback positions that spring to mind. First, I could host the single page in S3 and the blog in GitHub. The second is to have the page as a homepage on the blog. Let’s investigate!
The Journey
I like serverless, so want to use a blog platform that allows me to generate static pages on my laptop and upload them to S3 or something. Let’s Duck “static blog platform”. First result is a blog platform called Jekyll which looks good. And you can host it for free on GitHub Pages according to the site. Alright, I like free! Let’s set it up and give it a whirl!
The first challenge is that the Jekyll Quick Start pages and the GitHub Pages getting started guide are slightly different and I’m not immediately clear on how Jekyll integrates with GH to host the site. I don’t like things that “just work, as if by magic”; I’d rather understand how it works so I know what I can do with it, and what will make it break. But let’s set up GitHub first and then put Jekyll into that repository and see if we can figure it out.
Setting up the site
Create a GitHub repository for Pages
OK, this should be easy according to the getting started guide. Log in to GitHub, 2FA via Authy (you do use 2FA, don’t you??) and create a public repository called username.github.io.
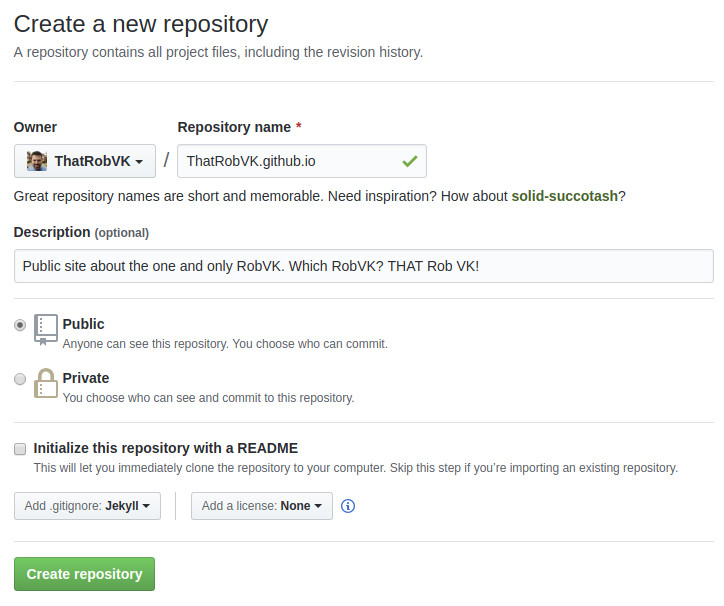
I’ve added a gitignore for Jekyll. I don’t know what that ignores or what artefacts Jekyll leaves behind that you don’t want in source control, but we’ll have a look at that in a bit.
I’d like my writings to be attributed, but I’m happy for code samples to be re-used by anyone for any purpose. I have chosen Creative Commons Attribution 4.0 International. The GitHub interface doesn’t recognise this license, so I’ll commit it myself. Just add a file called LICENSE with the license text in and push the commit. From here on out the GitHub UI does actually recognise this license correctly.
And here’s the result: my site on GitHub. Ready to rock!
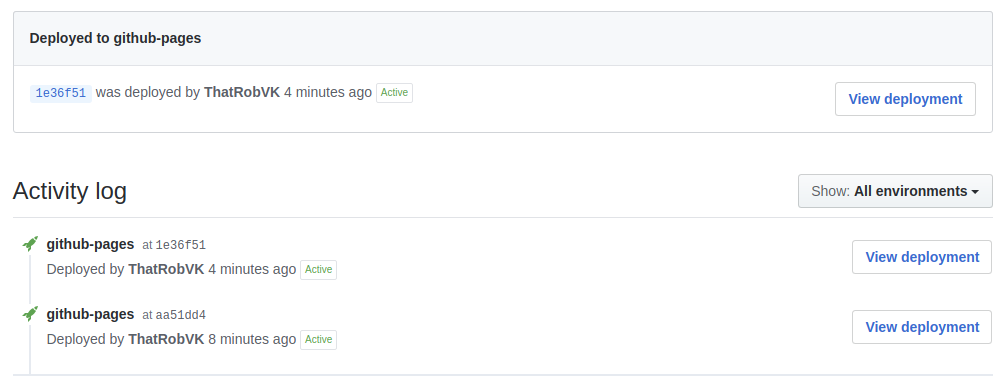
I’ve noticed a really neat feature in GitHub. It has automatically created an environment and set up a deployment to GitHub Pages for me. Must be because I’ve named the repository in the correct way - clever! The site currently displays a 404, but it’s a good start.
Multi-domain setup on GitHub Pages
DuckDuckGo and Stack Overflow to the rescue! First hit, it seems you can create a CNAME file in a folder with the domain name in it. When you then point your DNS at GitHub, it’ll route to the correct repository. Let’s give it a go.
According to the GitHub docs you can set up an ALIAS record. My domain is registered through AWS Route53 and I happen to know they support ALIAS records, so let’s try that! I create an alias to thatrobvk.github.io - nope, AWS doesn’t like that. Looks like you can only create alias records to AWS resources. Funnily enough that was what I thought, but if you don’t try you don’t learn, right?
OK, good old A and CNAME records it is. First the root domain name. GitHub provides instructions here and that’s done in minutes. Now for the 1-2 day wait for DNS propagation…
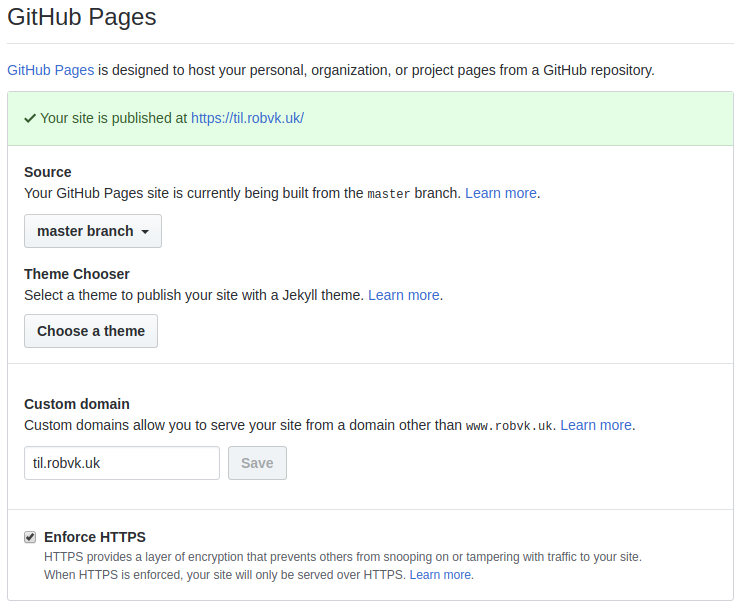
Meanwhile, I notice a sentence before configuring your custom domain with your DNS provider, add your custom domain to your GitHub Pages site - Whoops! Let’s quickly do that. There’s a GitHub quick start guide that shows you how to do it.
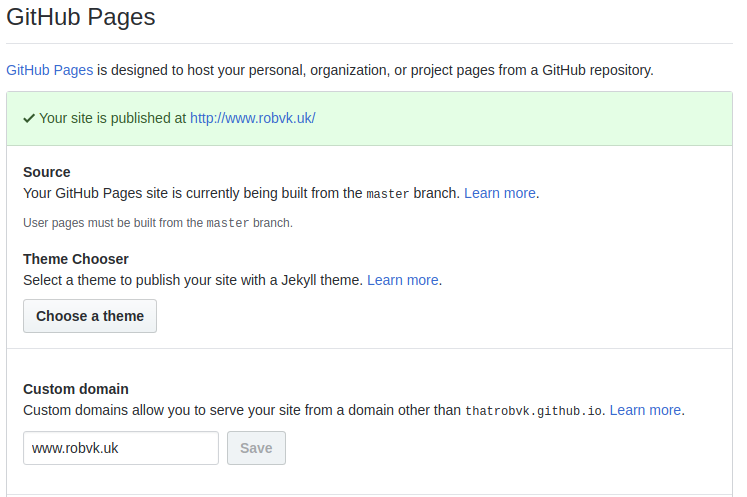
You can only add a single domain through the UI. So what about www and my blog subdomain? Let’s see what it’s done to the files. When I do a git pull I get a CNAME file down with robvk.uk as its contents.
At this point I spent a little time digging into whether I could get the DNS for the subdomain to point to a subfolder on the primary domain. I’m pretty sure DNS won’t do this and normally you’d configure the web server to route traffic by domain to a website on the server. I did read an amusing thread on a forum with one person becoming quite irate whilst repeatedly claiming their work DNS did exactly this. I gave it a go anyway, just in case. Even though Route53 accepts a full URL as the target for a CNAME, it doesn’t work.
DNS only deals with domain names and IP addresses. An A record maps a domain to one or more IP addresses. A CNAME maps a domain to another domain. as in “go look up this domain instead and route your traffic there.”
So how to get around this? This Stack Overflow answer we looked at before seems to insinuate you can have multiple CNAME files in different folders and it will route traffic automagically? Let’s try and find out.
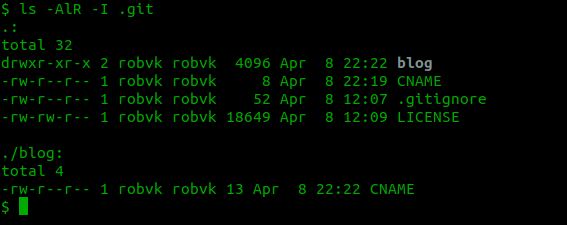
So the DNS is set with an A record for robvk.uk pointing at the GitHub IP addresses (found here) and a CNAME record for til.robvk.uk pointing at thatrobvk.github.io. There is a CNAME file in the root containing robvk.uk and another in the blog folder containing til.robvk.uk. I’ve added a test HTML page in each folder identifying which folder it is.
Well, a few hours have passed and doing a dig against the domain names shows they point to GitHub’s IP addresses! robvk.uk works, but til.robvk.uk returns a GitHub 404. Not what I wanted.
After a bit more digging I come across project pages. These are additional repositories that host documents and are hosted as subfolders off your main domain. I’m sure there’s benefit to reading all the documentation before you dive in. If only I could figure out what…
But I now have an idea. I create another repository called TodayILearned. In the repository settings I go down to GitHub Pages and switch it to serve from the master branch. It doesn’t allow you to select a domain name here, but if you upload the CNAME file we created earlier for til.robvk.uk it should work. I leave my DNS setup as-is as it already had the subdomain pointing at GitHub.
So why an A for the root and CNAME for TIL? According to the GitHub docs you can use a CNAME for the root but this can cause problems with things like e-mail. For this to work correctly, your DNS provider needs to support something called “CNAME Flattening”. I don’t have time to dig into what that is and whether Route53 supports it right now, so using an A record is the easiest way forward.
Edit: I searched later on and found that CloudFlare supports CNAME Flattening, but couldn’t find any AWS docs on the topic so I surmise they probably don’t support it. Good thing I went with an A record for the root!
And there you have it! robvk.uk is now going to my thatrobvk.github.io repository, and til.robvk.uk goes to my TodayILearned repository. One final tweak was to change the main site’s CNAME file to contain www.robvk.uk so that’s the domain people see instead of robvk.uk.
The TIL repo should be served from robvk.uk/TodayILearned if it was’t for the CNAME file, and a nice bonus is that if you go to that URL it’ll automatically redirect you to til.robvk.uk. Bonus! Nice one GitHub.
So that was probably the longest domain name setup I’ve done. The worst bit is that the Stack Overflow post had all the info, but I misread / misinterpreted it which led me down a rabbit hole. But I refreshed my memory on some DNS stuff and now know more about GitHub Pages hosting, so it wasn’t in vain.
Creating the Jekyll blog
Right, let’s follow the Getting Started Guide on Jekyll’s site.
Installing Ruby from apt doesn’t quite do the trick and doesn’t give you a fully operational Ruby environment. I didn’t spend any time digging into why not, instead I followed the install guide on Go Rails which did the trick. Interestingly my machine already had gem installed.
Go into your blog repo and type:
$ jekyll new .
$ bundle
$ bundle exec jekyll serve
Now go to http://localhost:4000 and there’s your (pretty bare) Jekyll site!
Plugins! So Many Plugins
I immediately wanted to see what plugins I could get to make my blog all pretty and useful. If you go to the Ruby Gems website and search for jekyll you get 47 pages of results. Just picking out the useful looking ones from the first two pages makes your tab bar look something like this:

GitHub Pages actually only supports a very select set of plugins. That’s probably a good thing or we’d still be here in 2 days picking plugins to use! Let’s just put a theme on it and see what it looks like. I’m sure I’ll come back to tweaking it later.
Apply a Jekyll Theme
I went for Beautiful Jekyll by Dean Attali. The easiest way to get set up with a theme is to fork the repo. But I already had a repo set up. Do I delete my repo and fork this one, or do I do it the hard way? Of course I’ll do it the hard way!
OK this didn’t turn out so hard. I cloned the repo, copied everything but the .git and .github folders into my blog repo and committed it. Load the site, aaaaand… blank page. Whoops. OK let’s try editing the _config.yml file, commit, aaaaand… blank page. Darn.
I ran the site locally using bundle exec jekyll serve and found an error output saying index.md had a layout that wasn’t recognised. Interestingly, index.md is a blank file that only defines a layout, while index.html is the one with actual content. So a swift git rm index.md sorted that right out, and now it loads with a very nice looking blog with dummy content!
And there you have it, a Jekyll blog hosted for free on GitHub pages with a separate homepage, each with their own domain name. Now to transfer this post from my notes to the actual blog and I’ll be off!
Configuring Jekyll
The main config is done through /_config.yml. Set the url to your domain, set the title, description and have a look around the rest of the file. Some settings are template specific while others are built in to Jekyll. See the Jekyll docs for more details on what Jekyll supports out of the box, or your chosen template’s site for its details. You can also have a look at this site’s _config.yml for an example.
Gitignore
I said I’d look into the .gitignore put in by GitHub when you select Jekyll in the GitHub UI. The main thing is that it ignores _site, which is where Jekyll generates the site when you run it locally. This shows that GitHub dynamically generates the site when it’s updated and doesn’t use the static files created locally. Besides _site there are a few standard files in the .gitignore but nothing Jekyll specific.
Key learnings
- GitHub Pages and Jekyll are easy - enable Pages and add the code from a Jekyll template and you’re off.
- GitHub runs the Jekyll site live so updates are available immediately.
- Only select plugins are available on GitHub and you can’t add more. If you need more plugins, you can build the site locally and push the resulting generated site to GitHub.
- Jekyll works with Markdown and provides templating for things like CSS. It’s easy to get started with and provides some pretty powerful functions.
- A repo can only contain a single domain, but you can use multiple repos to host multiple domains using
CNAMEfiles. - Route53 probably doesn’t support CNAME Flattening, so use an A record for the root domain.
- DNS doesn’t care about pages, remember it only does domain names and IP addresses!
End Result
DNS Setup
A record for robvk.uk set to GitHub Pages servers
CNAME record for www.robvk.uk set to robvk.uk
CNAME record for til.robvk.uk set to thatrobvk.github.io
GitHub Setup
thatrobvk.github.io repository has a CNAME file containing www.robvk.uk and an index.html.
TodayILearned repository has a CNAME file containing til.robvk.uk and the Jekyll template copied into it.
Both repositories are set to serve GitHub Pages from the master branch and to force HTTPS in the repository settings.
Jekyll
My laptop now has Ruby, Gem and Bundle installed so I can run the Jekyll theme locally using bundle exec jekyll serve, and I have a repo with a Jekyll theme that’s served on my domain name.
Useful Links
Jekyll Getting Started Guide
Using Custom Domains with GitHub Pages
List of Jekyll Plugins Supported on GitHub Pages
Jekyll Cheat Sheet